特别说明:Flutter SDK 1.22.5 及以上版本需要依赖 Git , 所以下面输入 flutter命令的时候,一般都是在 Git Bash 命令行窗口 中进行。
D:\sources\flutter_repos 是专门用于保存 Flutter 项目的文件夹。
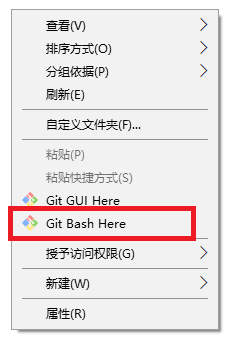
创建项目 在 D:\sources\flutter_repos(或其他用于保存 Flutter 项目的文件夹) 文件夹下鼠标右键,在弹出的快捷菜单中选择Git Bash Here 打开 Git Bash 命令行窗口
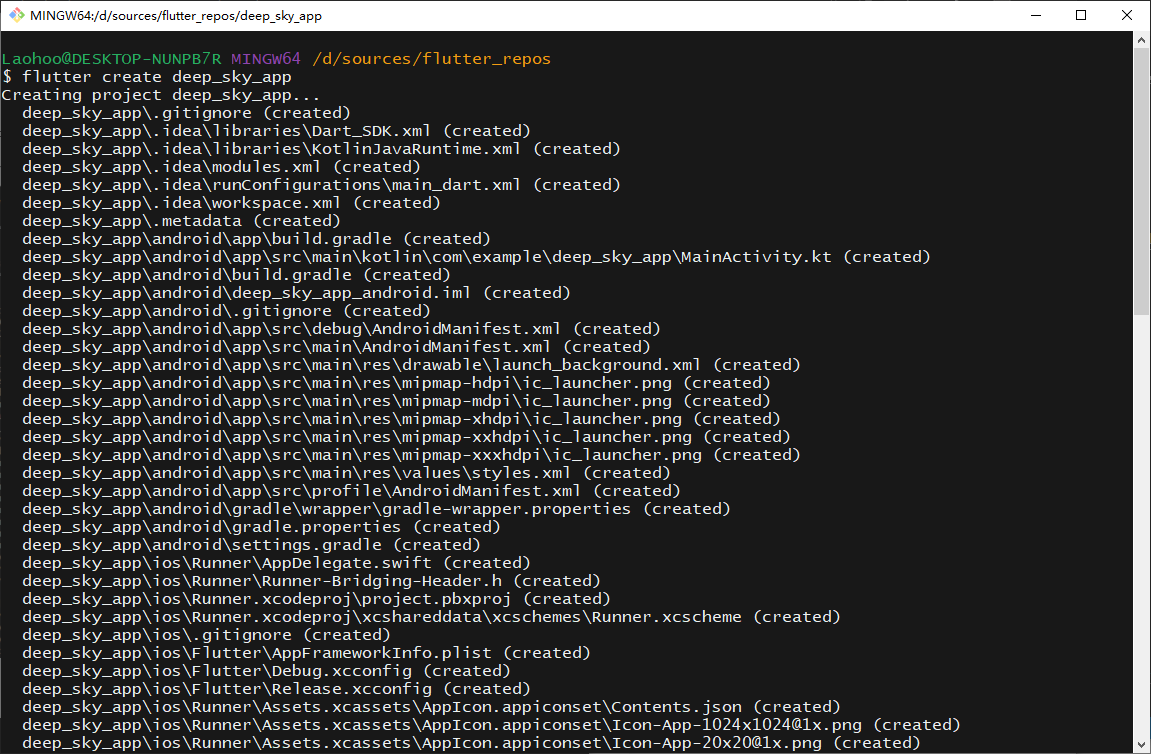
在打开的Git Bash 命令行窗口中输入命令: flutter create deep_sky_app
完整的命令执行过程如以下所示:
1
2
3
4
5
6
7
8
9
10
11
12
13
14
15
16
17
18
19
20
21
22
23
24
25
26
27
28
29
30
31
32
33
34
35
36
37
38
39
40
41
42
43
44
45
46
47
48
49
50
51
52
53
54
55
56
57
58
59
60
61
62
63
64
65
66
67
68
69
70
71
72
73
74
75
76
77
78
79
80
81
82
83
84
85
86
87
88
89
90
91
92
93
Laohoo@DESKTOP-NUNPB7R MINGW64 /d/sources/flutter_repos $ flutter create deep_sky_app Creating project deep_sky_app... deep_sky_app\.gitignore (created) deep_sky_app\.idea\libraries\Dart_SDK.xml (created) deep_sky_app\.idea\libraries\KotlinJavaRuntime.xml (created) deep_sky_app\.idea\modules.xml (created) deep_sky_app\.idea\runConfigurations\main_dart.xml (created) deep_sky_app\.idea\workspace.xml (created) deep_sky_app\.metadata (created) deep_sky_app\android\app\build.gradle (created) deep_sky_app\android\app\src\main\kotlin\com\example\deep_sky_app\MainActivity.kt (created) deep_sky_app\android\build.gradle (created) deep_sky_app\android\deep_sky_app_android.iml (created) deep_sky_app\android\.gitignore (created) deep_sky_app\android\app\src\debug\AndroidManifest.xml (created) deep_sky_app\android\app\src\main\AndroidManifest.xml (created) deep_sky_app\android\app\src\main\res\drawable\launch_background.xml (created) deep_sky_app\android\app\src\main\res\drawable-v21\launch_background.xml (created) deep_sky_app\android\app\src\main\res\mipmap-hdpi\ic_launcher.png (created) deep_sky_app\android\app\src\main\res\mipmap-mdpi\ic_launcher.png (created) deep_sky_app\android\app\src\main\res\mipmap-xhdpi\ic_launcher.png (created) deep_sky_app\android\app\src\main\res\mipmap-xxhdpi\ic_launcher.png (created) deep_sky_app\android\app\src\main\res\mipmap-xxxhdpi\ic_launcher.png (created) deep_sky_app\android\app\src\main\res\values\styles.xml (created) deep_sky_app\android\app\src\main\res\values-night\styles.xml (created) deep_sky_app\android\app\src\profile\AndroidManifest.xml (created) deep_sky_app\android\gradle\wrapper\gradle-wrapper.properties (created) deep_sky_app\android\gradle.properties (created) deep_sky_app\android\settings.gradle (created) deep_sky_app\ios\Runner\AppDelegate.swift (created) deep_sky_app\ios\Runner\Runner-Bridging-Header.h (created) deep_sky_app\ios\Runner.xcodeproj\project.pbxproj (created) deep_sky_app\ios\Runner.xcodeproj\xcshareddata\xcschemes\Runner.xcscheme (created) deep_sky_app\ios\.gitignore (created) deep_sky_app\ios\Flutter\AppFrameworkInfo.plist (created) deep_sky_app\ios\Flutter\Debug.xcconfig (created) deep_sky_app\ios\Flutter\Release.xcconfig (created) deep_sky_app\ios\Runner\Assets.xcassets\AppIcon.appiconset\Contents.json (created) deep_sky_app\ios\Runner\Assets.xcassets\AppIcon.appiconset\Icon-App-1024x1024@1x.png (created) deep_sky_app\ios\Runner\Assets.xcassets\AppIcon.appiconset\Icon-App-20x20@1x.png (created) deep_sky_app\ios\Runner\Assets.xcassets\AppIcon.appiconset\Icon-App-20x20@2x.png (created) deep_sky_app\ios\Runner\Assets.xcassets\AppIcon.appiconset\Icon-App-20x20@3x.png (created) deep_sky_app\ios\Runner\Assets.xcassets\AppIcon.appiconset\Icon-App-29x29@1x.png (created) deep_sky_app\ios\Runner\Assets.xcassets\AppIcon.appiconset\Icon-App-29x29@2x.png (created) deep_sky_app\ios\Runner\Assets.xcassets\AppIcon.appiconset\Icon-App-29x29@3x.png (created) deep_sky_app\ios\Runner\Assets.xcassets\AppIcon.appiconset\Icon-App-40x40@1x.png (created) deep_sky_app\ios\Runner\Assets.xcassets\AppIcon.appiconset\Icon-App-40x40@2x.png (created) deep_sky_app\ios\Runner\Assets.xcassets\AppIcon.appiconset\Icon-App-40x40@3x.png (created) deep_sky_app\ios\Runner\Assets.xcassets\AppIcon.appiconset\Icon-App-60x60@2x.png (created) deep_sky_app\ios\Runner\Assets.xcassets\AppIcon.appiconset\Icon-App-60x60@3x.png (created) deep_sky_app\ios\Runner\Assets.xcassets\AppIcon.appiconset\Icon-App-76x76@1x.png (created) deep_sky_app\ios\Runner\Assets.xcassets\AppIcon.appiconset\Icon-App-76x76@2x.png (created) deep_sky_app\ios\Runner\Assets.xcassets\AppIcon.appiconset\Icon-App-83.5x83.5@2x.png (created) deep_sky_app\ios\Runner\Assets.xcassets\LaunchImage.imageset\Contents.json (created) deep_sky_app\ios\Runner\Assets.xcassets\LaunchImage.imageset\LaunchImage.png (created) deep_sky_app\ios\Runner\Assets.xcassets\LaunchImage.imageset\LaunchImage@2x.png (created) deep_sky_app\ios\Runner\Assets.xcassets\LaunchImage.imageset\LaunchImage@3x.png (created) deep_sky_app\ios\Runner\Assets.xcassets\LaunchImage.imageset\README.md (created) deep_sky_app\ios\Runner\Base.lproj\LaunchScreen.storyboard (created) deep_sky_app\ios\Runner\Base.lproj\Main.storyboard (created) deep_sky_app\ios\Runner\Info.plist (created) deep_sky_app\ios\Runner.xcodeproj\project.xcworkspace\contents.xcworkspacedata (created) deep_sky_app\ios\Runner.xcodeproj\project.xcworkspace\xcshareddata\IDEWorkspaceChecks.plist (created) deep_sky_app\ios\Runner.xcodeproj\project.xcworkspace\xcshareddata\WorkspaceSettings.xcsettings (created) deep_sky_app\ios\Runner.xcworkspace\contents.xcworkspacedata (created) deep_sky_app\ios\Runner.xcworkspace\xcshareddata\IDEWorkspaceChecks.plist (created) deep_sky_app\ios\Runner.xcworkspace\xcshareddata\WorkspaceSettings.xcsettings (created) deep_sky_app\lib\main.dart (created) deep_sky_app\deep_sky_app.iml (created) deep_sky_app\pubspec.yaml (created) deep_sky_app\README.md (created) deep_sky_app\test \widget_test.dart (created) deep_sky_app\web\favicon.png (created) deep_sky_app\web\icons\Icon-192.png (created) deep_sky_app\web\icons\Icon-512.png (created) deep_sky_app\web\index.html (created) deep_sky_app\web\manifest.json (created) Running "flutter pub get" in deep_sky_app... 2,585ms Wrote 78 files. All done ! In order to run your application, type : $ cd deep_sky_app $ flutter run To enable null safety, type : $ cd deep_sky_app $ dart migrate --apply-changes Your application code is in deep_sky_app\lib\main.dart.
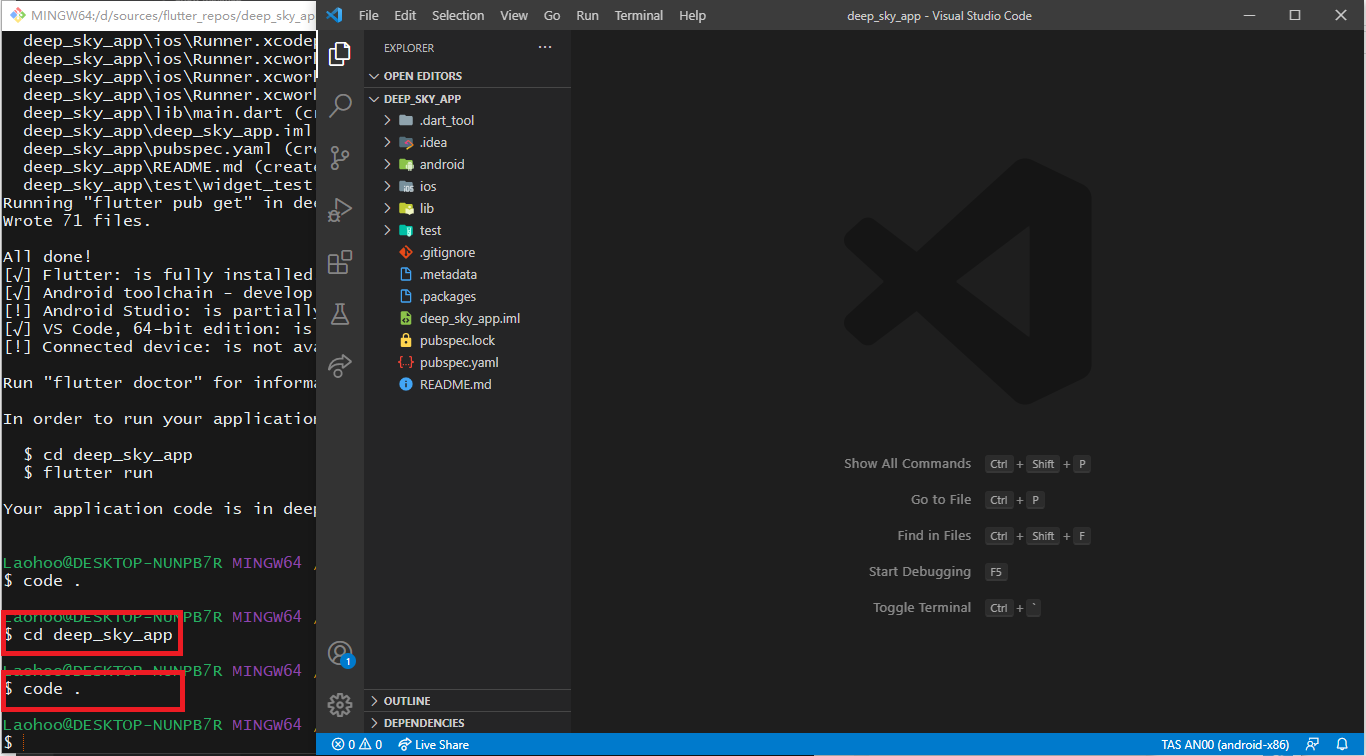
名为 deep_sky_app 的项目创建成功。使用以下两个命令进入项目文件夹,并使用 Visual Studio Code 打开项目:
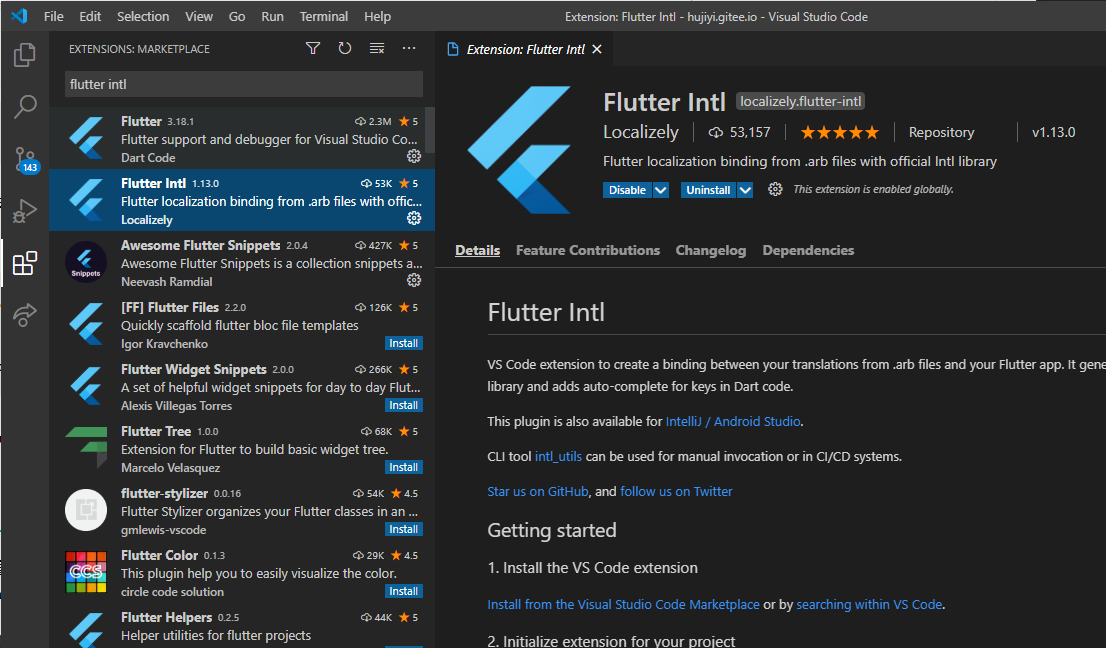
使用 Intl 添加多语言国际化支持 在 Visual Studio Code 中安装 Flutter Intl 插件(如果还没有安装该插件的话)
在项目的 pubspec.yaml 文件中增加以下包依赖:
Intl 的最新版本查询: https://pub.dev/packages/intl
intl_translation 的最新版本查询:https://pub.dev/packages/intl_translation
1 2 3 4 5 6 7 8 9 dependencies: flutter_localizations: sdk: flutter intl: ^0.16.1
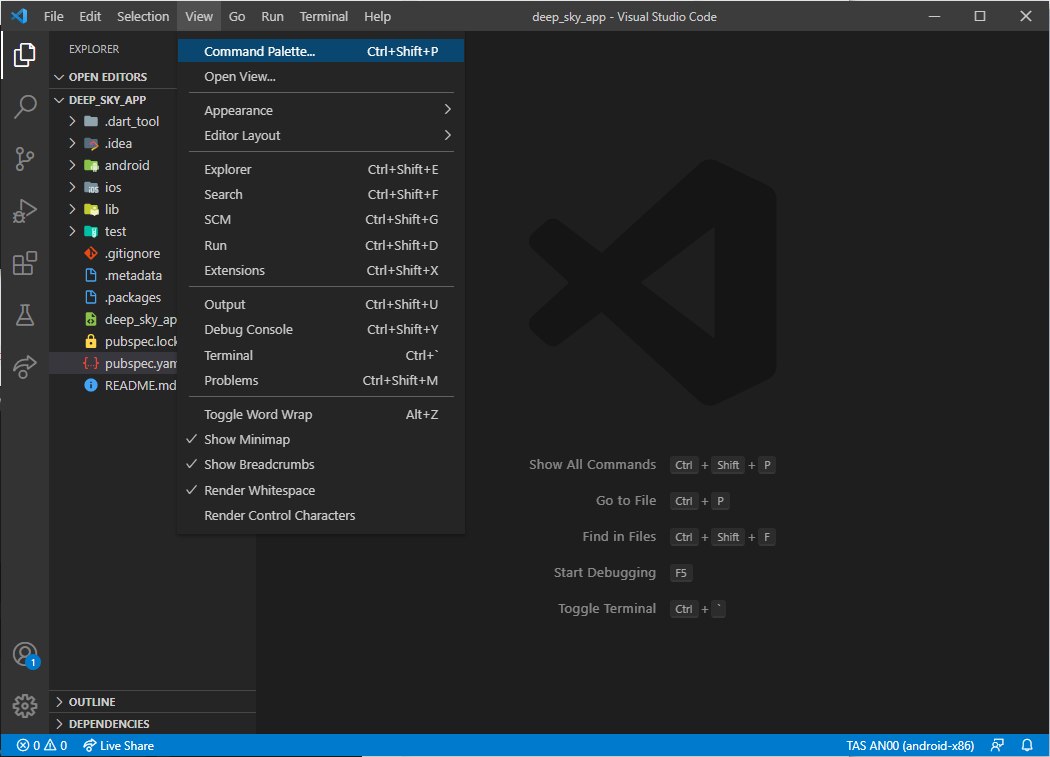
使用 Intl 初始化项目 在Visual Studio Code中打开命令面板: View -> Command Palette…
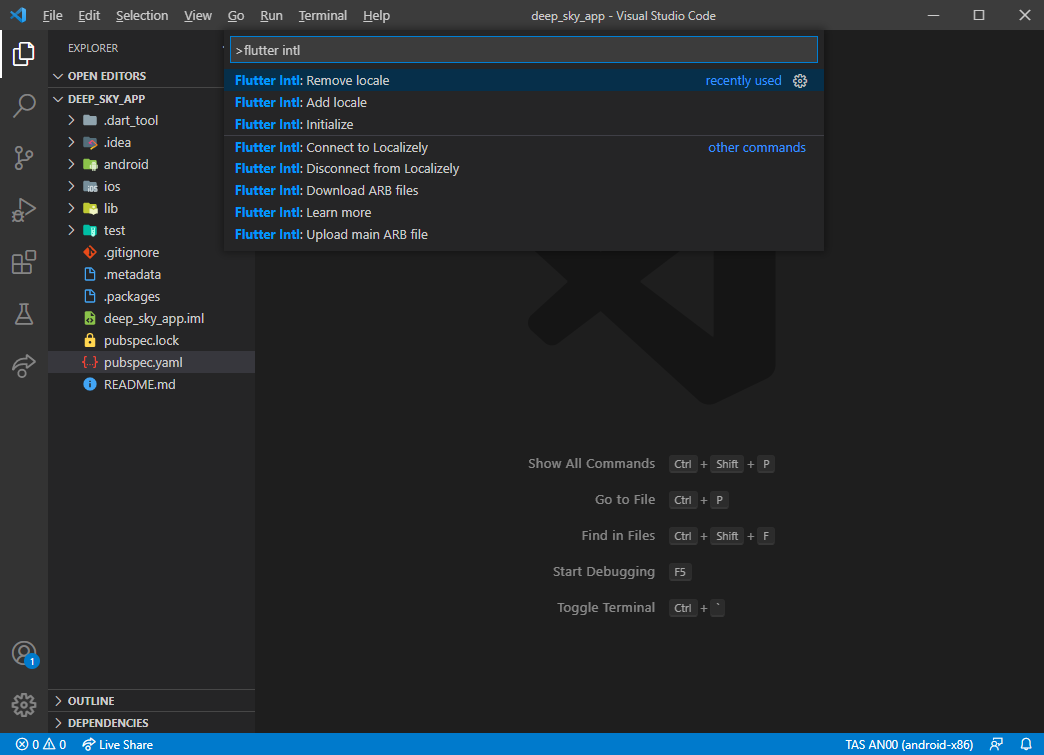
在打开的命令面板中输入 flutter intl, 在下拉的命令项中选择:Flutter Intl: Initialize, 开始执行项目的初始化。
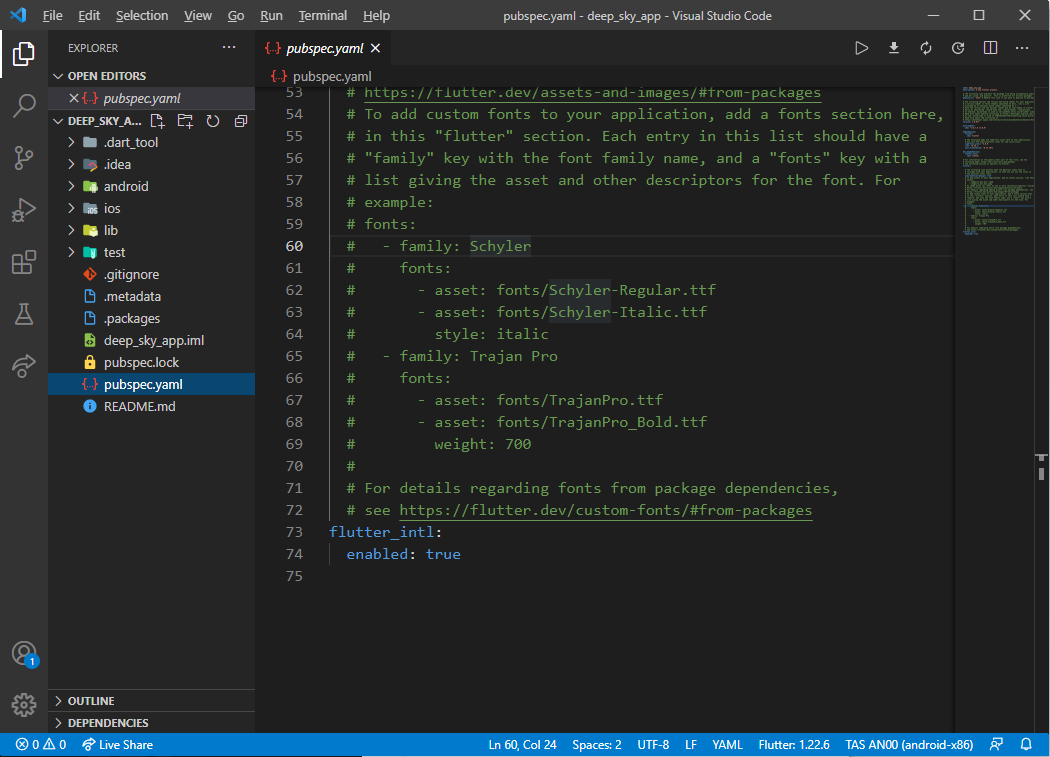
初始化执行成功后,在 pubspec.yaml 末尾会自动增加:
1 2 3 flutter_intl: enabled: true
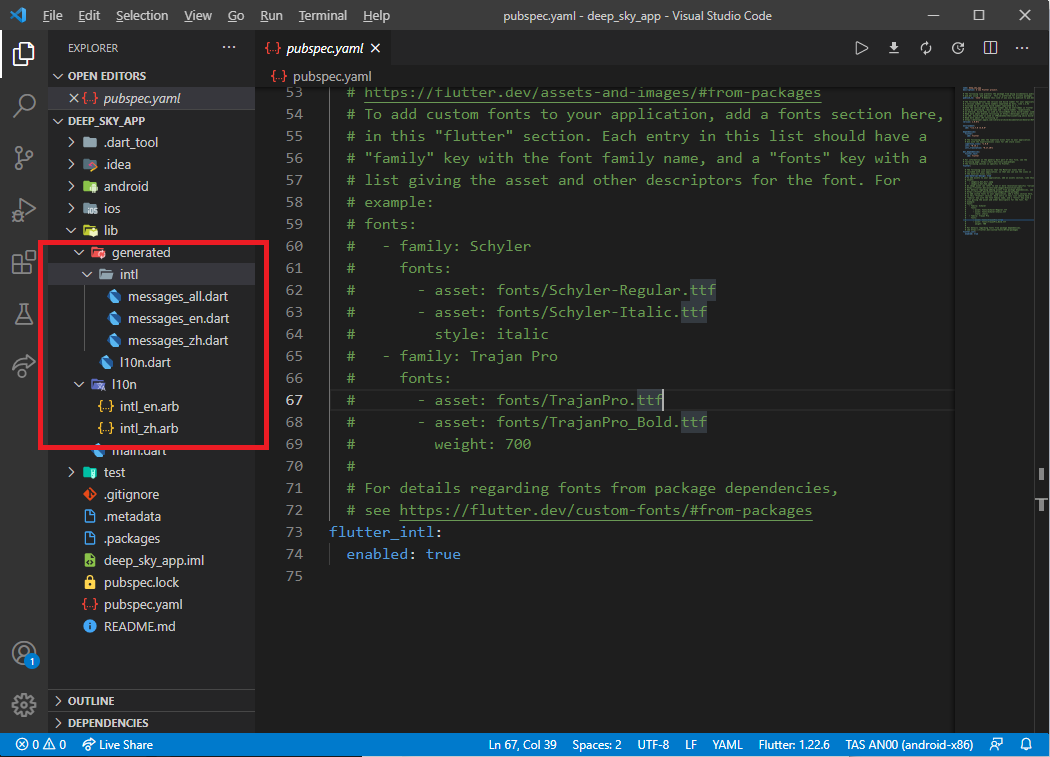
同时在 lib 文件夹下生成 generated 和 l10n 两个文件夹:
generated包下的intl目录默认生成 messages_all.dart 和 messages_en.dart 文件,messages开头的文件无需手动修改,是自动生成的。
generated 包下的 I10n.dart 是 Localizations和 Delegate 的实现,无需手动修改,是自动生成的。
l10n包下存在一个intl_en.arb文件,文案存放在此处。
ARB文件扩展名为:Application Resource Bundle 意为应用程序资源包,并得到Google的支持,每个.arb文件都包含一个JSON表,该表从资源ID映射到本地化值,文件名包含已为其转换值的语言环境。
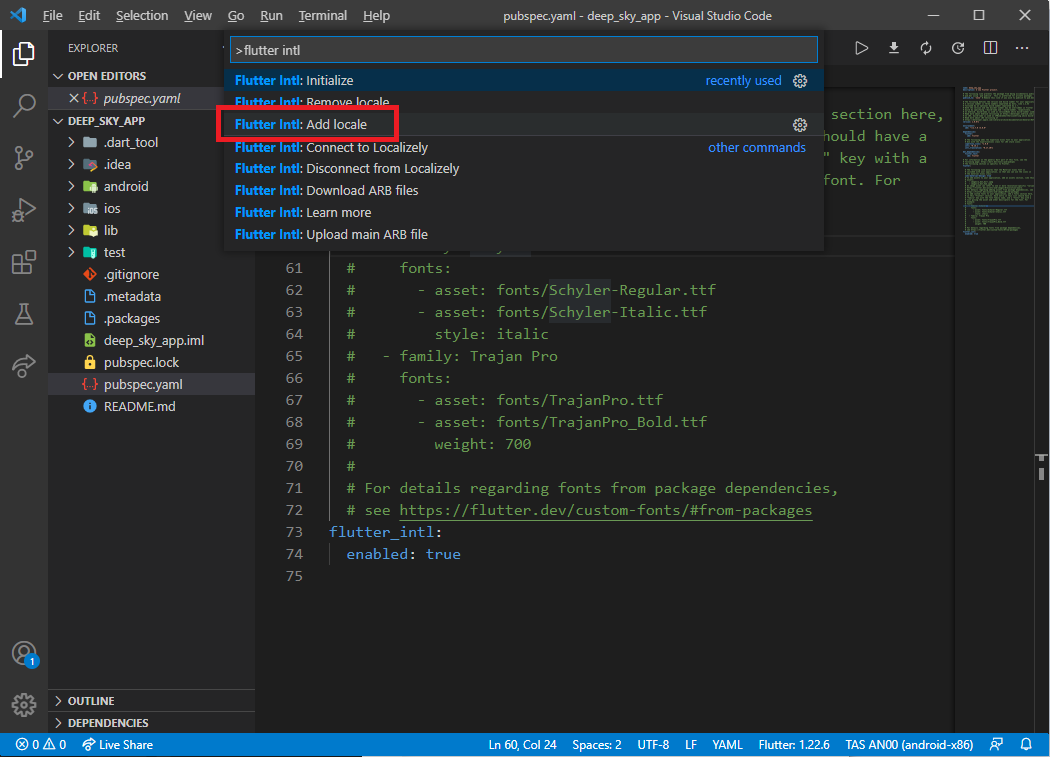
添加语言 在 Visual Studio Code 中打开命令面板: View -> Command Palette…
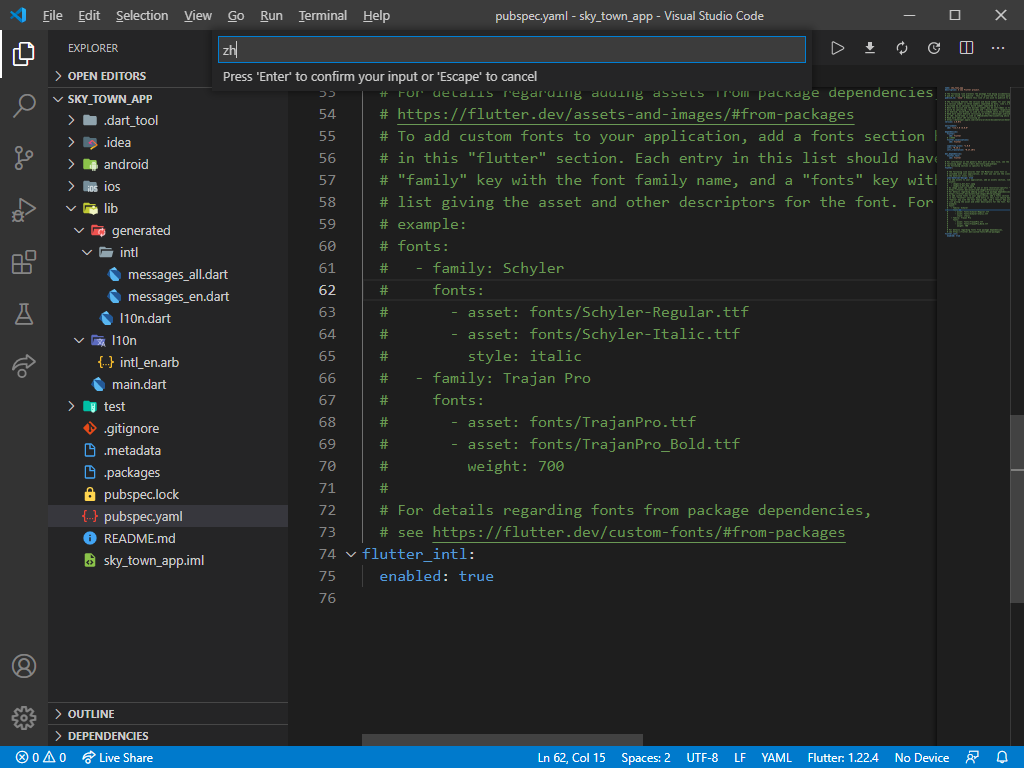
在打开的命令面板中输入 flutter intl, 在下拉的命令项中选择:Flutter Intl: Add Locale。
在命令面板中输入新的语言名称:zh
添加新的语言成功后,在 generated\intl 文件夹下多了一个名为messages_zh.dart 的文件
在 l10n 文件夹下多了一个名为 intl_zh.arb 的文件
添加系统国际化支持 在 intl_en.arb 和 intl_zh.arb 下添加文案
打开文件lib\l10n\intl_en.arb,修改内容如以下代码所示:
1 2 3 { "appName":"Deep Sky" }
打开文件lib\l10n\intl_zh.arb,修改内容如以下代码所示:
打开文件 lib\main.dart,在文件的前面添加以下两个引用:
1 2 import 'package:flutter_localizations/flutter_localizations.dart' ;import 'package:deep_sky_app/generated/l10n.dart' ;
然后在 MaterialApp 中添加如以下所示代码:
1 2 3 4 5 6 7 8 9 10 11 MaterialApp( ... localizationsDelegates: [ S.delegate, GlobalMaterialLocalizations.delegate, GlobalWidgetsLocalizations.delegate, GlobalCupertinoLocalizations.delegate, ], supportedLocales:S.delegate.supportedLocales, ... )
解释下上面这段代码出现的变量:
localizationsDelegates 列表中的元素是生成本地化值集合的工厂。
S.delegate 项目的本地化委托类,插件自动生成,它会根据你的arb文件自动生成对应的函数。
GlobalMaterialLocalizations.delegate 为Material Components库提供了本地化的字符串和其他值。
GlobalCupertinoLocalizations.delegate 为Cupertino Components库提供了本地化的字符串和其他值。
GlobalWidgetsLocalizations.delegate定义widget默认的文本方向,从左到右或从右到左。
supportedLocales支持的本地化。
S.delegate.supportedLocales 项目支持的本地化,插件自动生成,它会在你添加arb文件时自动更新你的支持的本地化。
在组件中使用国际化的值 在需要配置国际化的地方调用 S.of(context).key 即可. 没有context 时可以使用 S.current.key 。
当不能使用 S.of(context).key 进行调用时,会看到类似以下的错误信息:
1 2 3 4 5 ════════ Exception caught by widgets library ═══════════════════════════════════ The following NoSuchMethodError was thrown building MyApp(dirty): The getter 'appName' was called on null. Receiver: null Tried calling: appName
将 MaterialApp 中 title 的值修改为:S.of(context).appName (如果提示出错,则改为:S.current.appName)
修改完成后 lib\main.dart 文件中前段的代码如以下所示:
1 2 3 4 5 6 7 8 9 10 11 12 13 14 15 16 17 18 19 20 21 22 23 24 25 26 27 28 29 30 31 32 33 34 35 36 37 38 39 40 41 42 import 'package:flutter/material.dart' ;import 'package:flutter_localizations/flutter_localizations.dart' ;import 'package:deep_sky_app/generated/l10n.dart' ;void main() { runApp(MyApp()); } class MyApp extends StatelessWidget @override Widget build(BuildContext context) { return MaterialApp( localizationsDelegates: const [ S.delegate, GlobalMaterialLocalizations.delegate, GlobalCupertinoLocalizations.delegate, GlobalWidgetsLocalizations.delegate ], supportedLocales: S.delegate.supportedLocales, localeListResolutionCallback: (locales, supportedLocales) { print (locales); return ; }, title: 'Deep Sky' , onGenerateTitle: (context) { return S.of(context).appName; }, theme: ThemeData( primarySwatch: Colors.blue, visualDensity: VisualDensity.adaptivePlatformDensity, ), home: MyHomePage(title: 'Flutter demo' ), ); } }
运行项目 在 Visual Studio Code 菜单中选择: Run -> Start Debugging,运行成功后,选择手机(或模拟器)上的程序切换,在APP的缩略图上看到显示的标题文字。
===END===
